
In the ever-expanding world of Teyvat, some of the most haunting stories hide behind optional puzzles. One such tale is The Lone Isle Named Night, a quest tied to the mysterious Isle of Tozoz in Ochkanatlan. Players who venture there will uncover the tragic past of a fallen warrior and their dream of nurturing a Saurian egg named Aguara. Even in 2026, this quest remains a favorite for lore hunters and achievement collectors alike.
What Makes the Isle of Tozoz So Special?
For starters, the Isle of Tozoz sits in the northeastern part of Ochkanatlan. It is a place shrouded in mystery, and unlocking its secrets requires a bit of skill and the right tools. The puzzle itself is not just a test of combat—it is a test of observation, timing, and understanding the local mechanics. Players who love a good challenge will appreciate how the game weaves together exploration and storytelling here.
So, how does one even begin? The first step is to trigger the Isle of Tozoz puzzle. Players must either indwell an Iktomisaur or use the Masters of the Night-Wind Spiritspeaking ability on an Ancient Inscribed Ring. That action sets the entire puzzle in motion, and from there, three switches must be activated.
Finding the Three Switches
The quest requires players to activate three switches, each with its own twist. Here is a breakdown:
Switch #1: Near the Broken Bridge
The first button is located near a broken bridge. Players should be cautious of the guarding lights as they move toward this location. Those lights can trigger an attack if players are not careful. It is a good idea to approach slowly or use stealth to avoid unnecessary combat.
Switch #2: Southeast and Guarded
Traveling southeast will lead players to the second button. This one is not unguarded. An enemy known as a Tenebrous Mimiflora will spawn. Players must be prepared for a fight. The key here is to destroy its Void Ward depletion with elemental damage. Nightsoul-aligned hits are particularly effective, so characters from Natlan or those who can use Nightsoul blessings will have an easier time. After defeating the enemy, the switch can be activated.
Switch #3: Up in the Air
After activating the first two switches, players should look up. The final switch is not on the ground. To reach it, they need to follow a specific sequence:
-
Indwell the Iktomisaur near the Teleport Waypoint, or use characters like Ororon.
-
Return to the location of Switch #2 and gaze at the broken tower.
-
Utilize the Spiritspeaking ability on the graffiti to launch a wind current.
-
Soar up the wind current and land on a moving stone platform that leads to the final switch.
This part can be tricky, but it is also one of the most satisfying moments in the puzzle. The moving platform adds a nice bit of verticality to the exploration.
Restoring the Ancient Inscribed Ring and Starting the Quest
Once all three switches are activated, the Ancient Inscribed Ring is restored. Players should then use the Spiritspeaking ability again to unveil a gate. This gate leads to The Lone Isle Named Night quest. The quest itself is relatively short, with two straightforward objectives:
-
Investigate the hidden chamber.
-
Activate the incubator.
Inside the chamber, players will find a note. Reading it reveals more about the fallen warrior and their hopes for the egg. Then comes the emotional part: players must attempt to hatch the Unhatched Saurian Egg. Unfortunately, the attempt fails. The egg does not hatch, and the quest comes to a close. It is a bittersweet ending, but it adds a lot of depth to the lore of Ochkanatlan.
The Achievement and Its Rewards
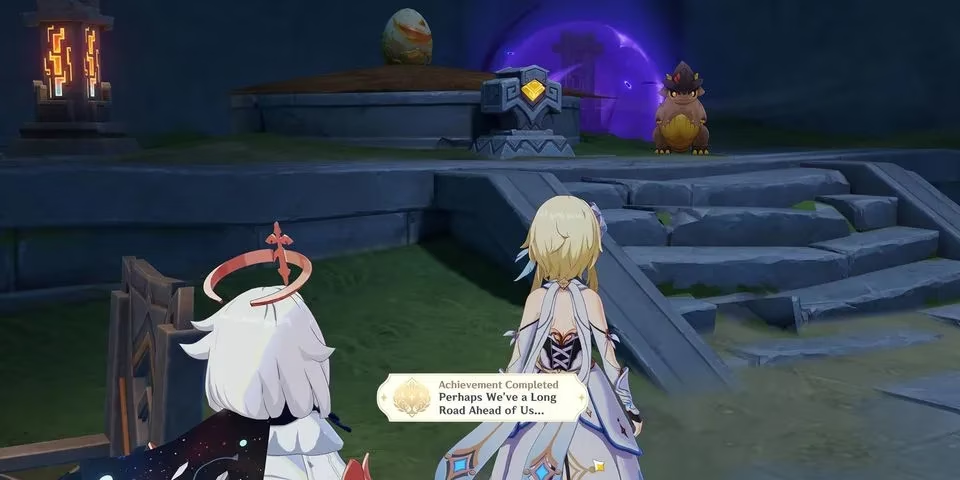
After completing the quest, players will earn the achievement Perhaps We've a Long Road Ahead of Us.... This achievement is not just a badge of honor—it also comes with a tangible reward. The Unhatched Saurian Egg is added to the Rest Area, where players first met their Saurian companion. Even better, Tubby, the Serenitea Pot spirit, will replicate the egg so it can be used as furniture in the player's home. That means the memory of Aguara can live on in the Serenitea Pot.
Here is a full list of rewards for completing The Lone Isle Named Night quest:
| Reward | Amount |
|---|---|
| Adventure EXP | 300 (or 3,000 Mora for AR 60 players) |
| Primogems | 40 |
| Hero's Wit | 2 |
| Mora | 30,000 |
| Mystic Enhancement Ores | 3 |
These rewards are well worth the effort, especially for players who are saving up Primogems for upcoming banners.
Tips for a Smooth Run
-
Bring a character who can deal Nightsoul-aligned damage, such as Ororon or any Natlan character with the right abilities.
-
Keep an eye out for guarding lights near the first switch. They can be avoided with careful movement.
-
If players struggle with the wind current, they should make sure they are aiming at the correct graffiti on the broken tower.
-
The quest is solo-friendly, but having a friend along can make the combat sections faster.
Final Thoughts
As Genshin Impact continues to evolve, quests like The Lone Isle Named Night add depth and excitement to the gameplay experience. They remind players that Teyvat is full of small, emotional stories waiting to be discovered. Whether players are chasing Primogems or simply love a good mystery, the Isle of Tozoz delivers. So, if they haven't yet, they should mark the Isle of Tozoz on their map and set sail. After all, perhaps we've a long road ahead of us—but it is one worth traveling.
And for those who enjoy collecting achievements, this one is a must-have. It is a short journey, but it leaves a lasting impression. 🥚🗺️🏆